Monday 15 December 2014

Simple shells beanie FREE PATTERN!

 Recently, I was asked to do a couple of very girly, pretty hats, and I was soooo excited! Don't get me wrong, I really love making all the cute lil animal hats, and sets too, but I don't do many just plainly pretty hats. A customer sent me a couple of photos of something she found on Google. I searched for a couple days online between caring for my kids, my house and my hubby, and nothing. Nada. Zip. Again, I couldn't find any patterns for what I wanted. So, to the drawing board I went. I had a photo to work from, so why not just write another pattern? That's exactly what I did and this was the result. I think it turned out really pretty. This was my third attempt to get the proper size and look I was going for. I ripped the other two out because I just wasn't happy with them. But this one made me happy, and after double checking with my client I whipped up another, as she had ordered two. They worked up really quick, and I loved how pretty they were. I might just have to make one for me!

Materials needed:

worsted weight yarn. (I used Bernat Super Saver in Ivory)
Size H 5.00mm hook
needle for finishing off
Second color worsted weight yarn for the flower.

I made these hats for two year old twins, so they will fit approximately 14"-17" head size, depending on how loose or tight you crochet. Check out the hat size chart to see more on how to check your size.

Hat:

1) starting with a magic ring, ch2. dc 11 more in ring. pull tight sl st to top of ch2 (12 sts)

2) ch2. Dc in same st as ch 2. 2dc in each st around. join with sl st. (24 sts)

3) ch 2. dc in same st as ch 2. dc in next st. *2dc in next st. dc in next st.** Continue from * to ** to end of round, join with sl st. (36 sts)

4) ch 2. dc in same st as ch 2. dc in next  2 sts. *2dc in next st. dc in next 2 sts.** Continue from * to ** to end of round, join with sl st. (48 sts)

5) ch 2. dc in same st as ch 2. dc in next 3 sts. *2dc in next st. dc in next 3 sts.** Continue from * to ** to end of round, join with sl st. (60 sts)

6) ch3. 4 dc in same st as ch3. *skip next 2 sts. sc in next st. skip next 2 sts. 5dc in next st.(shell made)** Continue from * to ** until you are all the way around with one more sc to do. skip 2 sts, sc in next st. sl st to top of ch 3 from first shell made.

7) ch3. 4 dc in same st as ch3.  *sc in middle st of previous row's shell. 5 dc in sc of previous row. ** continue from * to ** until you get to the last shell made. You will have one more sc to do. Insert hook through middle st of previous row's shell AND through the top of the ch3 from the start of this row. yo and draw through all loops on hook.

8) ch3. 4 dc in same st as ch3. *skip next 2 sts. sc in next st. skip next 2 sts. 5dc in next st.(shell made)** Continue from * to ** You will have one more sc to do. Insert hook through middle st of previous row's shell AND through the top of the ch3 from the start of this row. yo and draw through all loops on hook.

9) continue rows 7 & 8  until you have 10 rows of shells made OR until hat reaches desired length. The hat height for a two year old should be between 7.5 and 8 inches. Finish off hat with an invisible stitch.

FLOWER
use contrasting color

1) Start with magic ring. sc 12 sts in ring and pull tail to close. Join with a sl st.

2) sc in first st. ch 3. *skip next sc,  and sc in next st.(loop made) ch 3.** Continue around until you have 6 loops made. Join with sl st behind first sc.

3) In each loop made you are going to make the following stitches to make the petals of the flowers. sc, hdc, dc, dc, hdc, sc.  complete all 6 petals, and sl st behind the first sc made.

4) you are going to make 6 more loops. start by ch4. sl st to first sc from row 2. ch 4. sl st to second sc from row 2. You will have 6 loops behind the petals from row 3.

5) In each loop made you are going to make 6 more petals. In each loop make the following sts: sc, hdc, dc, dc, dc, hdc, sc. After all 6 petals have been made, sl st behind first petal. leave a long tail for sewing on flower. I use this tail for sewing on a button as well. Make sure it is fastened well, we don't want any little ones choking on buttons.


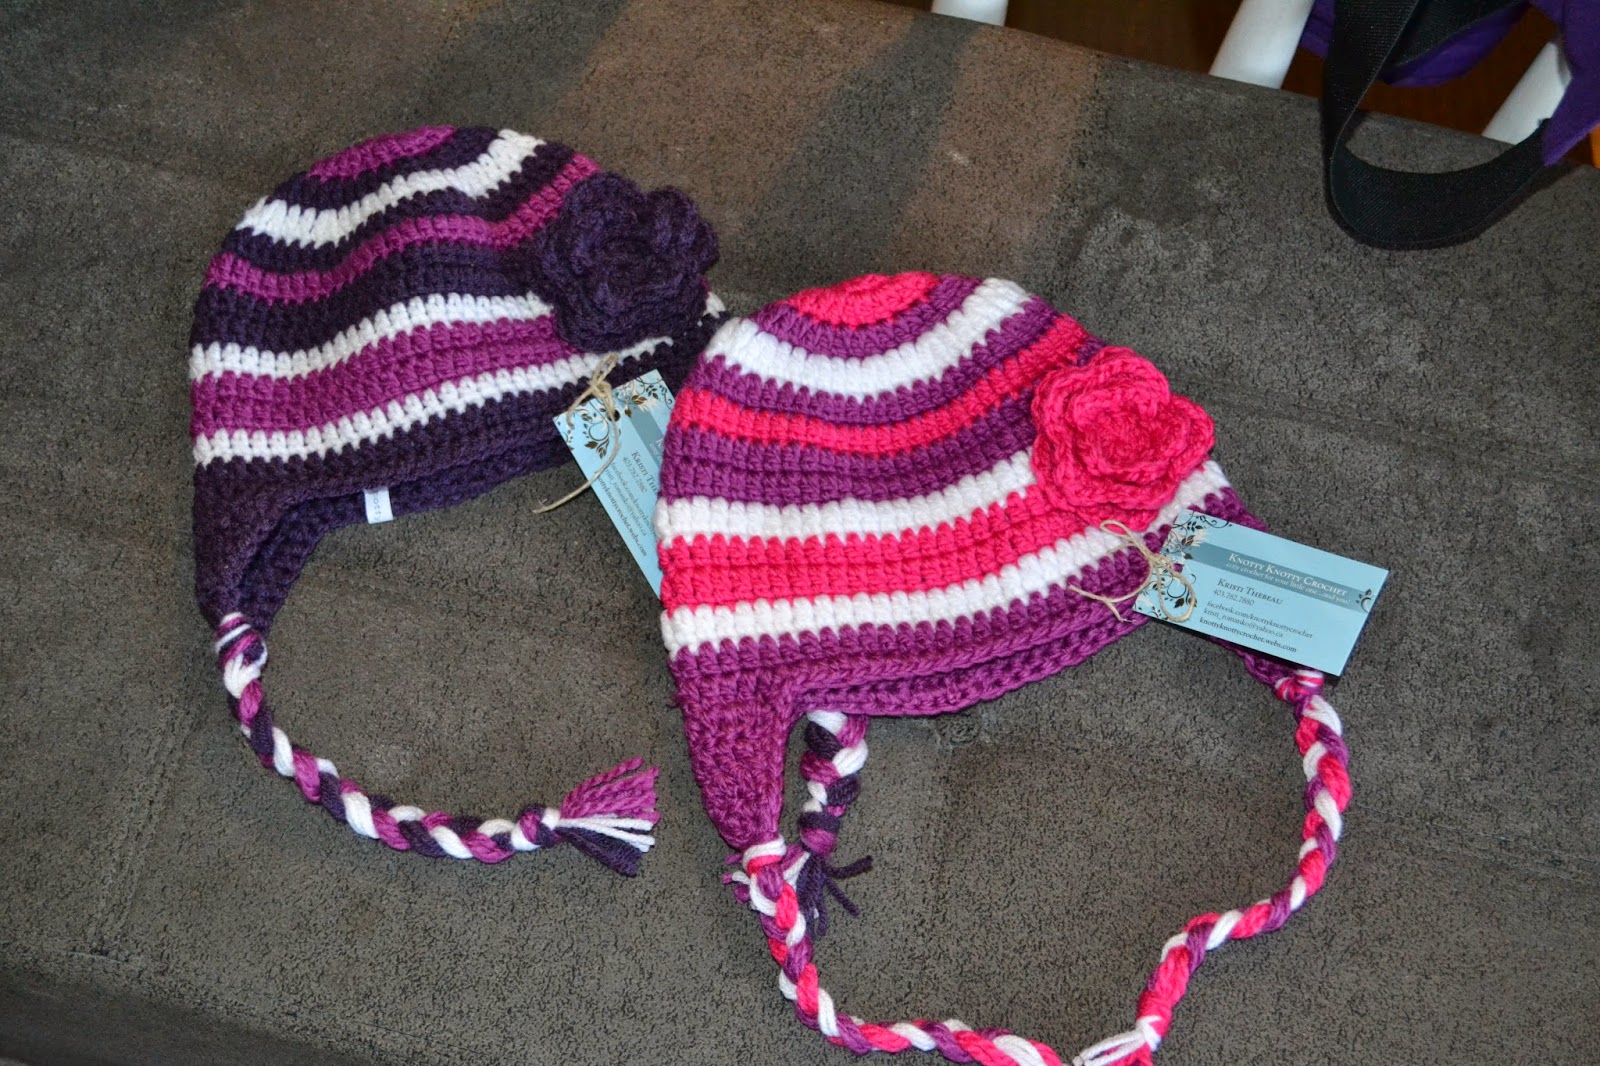
This hat is so thick and cozy it stands up all on it's own


For a list of crochet stitches and how to make them go here.

**You may use this pattern to sell items, but I request that a link or credit be given back to this site** This is a ©Knotty Knotty Crochet pattern, and may not under any circumstances be sold in whole or in part. Duplication is by written permission only. All photos on this blog are ©Knotty Knotty Crochet and MAY NOT UNDER ANY CIRCUMSTANCES be used to sell your items.


love my labels!

Saturday 26 July 2014

Princess Anna bonnet FREE PATTERN

I know it is the middle of summer, and that that usually means warm weather, lots of outside play, and enjoying the sunshine. However, here in Alberta Canada, summer can mean turning on your air conditioner one day and your furnace the next. That is the kind of week we have had. The beginning of the week has seen close to 30 degree weather, whereas the last two days found my family huddled with sweaters and blankets on the couch in front of the fireplace drinking hot cocoa and wondering who stole summer. Perhaps it was Elsa.

My older kids being away at various day camps, I was left home these past few weeks with just my littlest one, three year old Lizzy. Without siblings home I'm thinking she really didn't know what to do to entertain herself. She usually likes to make her rounds playing house with her older sister, acting out scenes from her big brother's latest Magic Treehouse novel (I think last time they were ninjas in Japan) and reducing her other brother to tears in record time. (Usually about two nano-seconds.) That last one is a special talent of hers, much to her soft-hearted brothers - and her mother's- dismay.

So when everyone else was out of the house, we had some snuggle on the couch time watching her favorite movie: Frozen. This prompted her to ask for an Anna hat, and while I don't usually crochet in the summer unless it is for custom orders, I couldn't resist. (plus I had all the right colors in the basket beside the couch. I just couldn't say no to her!

So here goes the pattern. I am writing by memory here, so as always please leave any mistakes in the comment section.

Anna Bonnet:

H hook
worsted weight yarn in pink, purple orange and cream, fuzzy white yarn
needle.
Fits my 3 1/2 year old.

Row 1: leaving a long tail for sewing, start with a slip knot and ch 55. (use more sts for larger head, less for smaller.)

Row 2: dc in third ch from hook, dc in each st across (53 sts) Ok. If you have 52 here, don't sweat it. the numbers don't really matter. Just make sure you have the same in each row proceeding.

Row 3-13: Ch 2. dc in each row across making sure you always have the same number of stitches. You should end up with a rectangle. break yarn and weave in THIS END ONLY.

Using the long tail you started with, fold the rectangle in half and sew up one side so you are left with a square. turn so the seam is on the inside of the bonnet.

Using a darker purple attach yarn to bottom corner of bonnet with right side showing. Working along the part that will frame the face: ch1. *Skip next st. 3sc in next st. ** continue from * to ** along the face framing part of the bonnet. ch 2 in corner and sc evenly along the part that goes around the back of the head.

With bonnet folded in half count 11 sts from the top on each side and place marker. sc with fuzzy white yarn from one marker to the other. Repeat until you have your desired fuzzy-ness.

To attach the hair: I cut lengths of orange and cream and looped them through just under the bonnets bottom edge. I used 2 strands in each place that I attached the yarn, over 9 stitches. (so 18 strands total per side.) I used 6 strands of the cream yarn to show Anna's streak that is in her hair. I attached them in each of the nine rows starting from the seam, however, if I were to make this again I would have started them farther forward.

I hope this pattern is helpful and useful for you. Please leave comments on anything that is not clear. Thanks!


For a list of crochet stitches and how to make them go here.

**You may use this pattern to sell items, but I request that a link or credit be given back to this site** This is a ©Knotty Knotty Crochet pattern, and may not under any circumstances be sold in whole or in part. Duplication is by written permission only. All photos on this blog are ©Knotty Knotty Crochet and MAY NOT UNDER ANY CIRCUMSTANCES be used to sell your items.


Wednesday 5 March 2014

Ladies Newsboy hat. FREE PATTERN!

 So, I really REALLY love the little newsboy hat pattern that I came up with. I thought it would work well as an adult hat as well. It was a bit of trial and error, but I think I finally came up with something that I like and that fits well. I also had this really beautiful charcoal grey yarn sitting in my basket, and I just knew I wanted to make something for me with it. So here goes my first adult hat pattern. As always, please let me know if you find a problem.

Materials used:

H hook
Worsted weight yarn
yarn needle for weaving ends.

Round 1: Begin with magic ring. 10 sc in magic ring. pull tail to close ring. DO NOT JOIN

Round 2: 2 sc in each st around. join with sl st to first st.  (20 sts.)

Round 3:  ch 3. Dc in same st as ch 3, dc in next st. cr2dc. (see below for instructions.)

Here is how the cross over 2 dc st is made. yarn over hook (yoh) and insert the hook backwards from front to back in the last sc. (where you did the ch 3). yoh and draw up a loop keeping the yarn loose. yoh and draw through 2 strands on hook. Draw through last two strands. cross over 2 dc made. (cr 2 dc). 

Dc in next 2 sts. cr 2 dc. (group made)  Repeat for a total of 10 groups made. Join with sl st to top of ch 3. 

Round 4: ch 1. sc in same st. sc in next 2 sts. *2 sc in next st. sc in next 2 sts**  Repeat from * to **. join with sl st to first st. (40 sts)

Round 5: ch 3. Dc in same st as ch 3, dc in next st. cr2dc. Dc in next 2 sts. cr 2 dc. Repeat for a total of 20 groups made. Join with sl st to top of ch 3. 

Round 6: ch 1. sc in same st. sc in next 4 sts. *2 sc in next st. sc in next 4 sts** Repeat from * to **. Join with sl st. to fist st. (70 sts)

Round 7: ch 3. Dc in same st as ch 3, dc in next st. cr2dc. skip next st. *Dc in next 2 sts. cr 2 dc. skip next st.** Repeat for a total of 24 groups made. Join with sl st to top of ch 3.

Round 8: Repeat row 7

Round 9: sc in each st around. join with sl st.

Rounds 10 & 11: Repeat rows 7 & 8

Round 12: Repeat row 9 

Rounds 13 & 14: Repeat rows 7 & 8

Rounds 15-18 Repeat row 9 DO NOT BREAK YARN.


BRIM

After joining the last row of sc with a sl st, ch1. sc in next 28 sts. 
With right side still facing you, work backwards (left to right) along the 28 sts  using reverse sc in each st. Here is a video tutorial. 

ch 1 and work 1 sc in next 28 sts again. ch1 and reverse sc back over brim. Repeat one more time. This will give you three rows for the brim of the hat. 
Now to give it a bit of shape. 
ch 1 sc2tog. sc to last 2 sts and sc2tog.

Work 4 sc evenly down the edge of the brim. sc in each st around the hat and work 4 sc evenly up the other side of the brim. Finish off with an invisible knot. Weave in ends.


I think I may consider adding a strap like on the little brimmed hat, or an ivory colored flower. 

For a list of crochet stitches and how to make them go here.  

**You may use this pattern to sell items, but I request that a link or credit be given back to this site** This is a ©2014 Knotty Knotty Crochet pattern, and may not under any circumstances be sold in whole or in part. Duplication is by written permission only.
All photos on this blog are ©Knotty Knotty Crochet and MAY NOT UNDER ANY CIRCUMSTANCES be used to sell your items.


Friday 14 February 2014

"Boo" inspired three piece set. FREE PATTERN

This was a recent custom order that scared the bejeezers out of me. It looked so complicated, yet it was so stinkin' easy I just had to share.  It is basically patterns that are already right here on my blog, with some simple additions, and voila! You have a little set that makes you look like an absolute pro! Do you remember the little monster costume Boo wore in the Monsters Inc movie? it looked like this:


I was asked to make a newborn Boo costume with hat, diaper cover and booties. 
Here is what I came up with:


So I will tell you how I did it. The hat is the shell stitch beanie. I added some eyes and hair to the top, and some teeth on the bottom. I stuffed the eyes with poly-fill so that they would be stiff enough to stand up.


The eye pattern is as follows:

MAKE 2

1) with black yarn and g hook, begin with magic ring.
2)  ch 2. 8 hdc in magic ring. pull tail to close. sl st to the top of ch 2.

3)change to white yarn. ch 2. hdc in same st. 2 hdc in each st around. join with sl st to top of ch 2. You should have 16 hdc but if you have 18, don't panic. It will still work just fine.

4) ch 2. hdc in each st around. join.

5) change to grey. Ch 2. hdc in each st around. join.
6) ch 1. *sc2tog. sc in next st. ** Repeat from * to ** all the way around. join.

7) ch 1. sc2tog all the way around. This should bring you to about 4/5 stitches (it really doesn't matter which). Stuff your eye here. 

8) continue working sc around WITHOUT joining until the 'stem' of the eye is about 1.5-2" or however long you want it. Break off yarn, leaving a long tail for sewing. stuff stem with the poly fill quite tightly. sew eyes onto the top of your shell stitch beanie.
TEETH (make 2)
With white yarn and g hook
1) Start with ch 5. 
2) In second ch from hook, hdc. hdc in next 2 sts. You should end up with a little square.  Break yarn, leaving a long tail for sewing onto hat. I attached them on the inside of the hat. 

I added strands of grey to the top of the hat. I twist braided them and tied a little knot on the ends. You can watch a tutorial that I found here.


The diaper cover pattern can be found here

The booties are the Mary Jane pattern worked up with grey for the sole, and purple for the shoe. I didn't have tiny grey buttons so I just sewed little french knots in place and I think it worked out rather well!


Pretty easy huh?
Next, I want to try to make a baby Mike Wazowski set, complete with claws on the booties!


For a list of crochet stitches and how to make them go here.

**You may use this pattern to sell items, but I request that a link or credit be given back to this site** This is a ©Knotty Knotty Crochet pattern, and may not under any circumstances be sold in whole or in part. Duplication is by written permission only.

All photos on this blog are ©Knotty Knotty Crochet and MAY NOT UNDER ANY CIRCUMSTANCES be used to sell your items.


Friday 3 January 2014

super bulky striped hat FREE PATTERN!

Happy New year everybody! We are enjoying a relatively warm day here so I've booted the kids outside and thought I could jot down this pattern for you quickly. We will see how long they give me before causing mayhem!

This is my new favourite hat to do because it is super simple, yet looks great. You can use as many or few colors as you like, and each hat will be unique and different with the SAME PATTERN! Gotta love that.


I have been having a little pouting fit lately because the bulky yarn I used to use from Bernat was discontinued and replaced with a new 'super' bulky yarn. sheesh. Didn't they consider that I had already spent a LOT of time figuring out exactly how many stitches, rows, etc went into making each size of hat perfectly....they probably didn't. And so, my pattern that I love is no longer useful with the yarn I liked because it is no longer available. But the colors I love are, just in this new bulkier yarn. So I took the time to play with hook size, stitches, counting measuring and I FINALLY figured out a way that I can make my hats.  They are a bit thicker, and warmer which is fantastic considering the average tempurature here in northern Canada has been around the -30 C mark (that would be around -22 F for my friends south of the border).

So here is my pattern:

Materials
super bulky yarn size 6 in three colors (I used Bernat Softee Chunky in Grape, Dark Mauve and White)
K hook (6.5mm)
Darning needle for weaving in ends

COLOR A

Begin with magic ring

Round 1: 10 hdc in the magic ring. Pull tail closed and join to first hdc. (10 sts)

Round 2: ch1. 2 hdc in each stitch around. Join to first hdc made. (20 sts)

CHANGE TO COLOR B

Round 3: ch 1. *2 hdc in first st. 1 hdc in next st.** Repeat from * to ** 9 more times. (30 sts.)

CHANGE TO COLOR C

Round 4: Ch 1 *2 hdc in first st. 1 hdc in each of the  next 2 sts. **  Repeat from * to ** 9 more times. (40 sts)

CHANGE TO COLOR B

Round 5: Ch1. *2 hdc in first st. 1 hdc in each of the next 3 sts.** Repeat from * to ** 9 more times. (50 sts)

CHANGE TO COLOR A

Round 6: Ch1. hdc in each sts around. (50 sts)

CHANGE TO COLOR B

Rounds 7 & 8: Ch1. hdc in each sts around. (50 sts)

CHANGE TO COLOR C

Round 9: Ch1. hdc in each sts around. (50 sts)

CHANGE TO COLOR A

Rounds 10 & 11: Ch1. hdc in each sts around. (50 sts)

CHANGE TO COLOR C

Round 12: Ch1. hdc in each sts around. (50 sts)

CHANGE TO COLOR B

Round 13: Ch1. hdc in each sts around. (50 sts)

Fasten off yarn using invisible knot.


ADDING EARFLAPS


1) Fold hat flat with the joining seam in the middle of the back. Be sure the front of the hat is facing you. Count in four stitches from each side and place a marker at both spots. count back 10 sts, including the st the marker is in and place another marker at each spot. This is where the earflaps should be.  Join yarn (I join the left earflap from the front of the hat and the right one from the back so my flaps both look the same.)  ch 2, dc in same st as ch 2. dc over next 9 st. (10 dc, as ch 2 does not count as dc) ch2 turn

2) dc2tog  dc till 2 sts remain. dc2tog. ch 2. trun.

3) dc2tog over next 2 sts. dc until 2 sts remain.  dc2tog.  ch 2. turn.

4) Dc2tog over next 2 sts. dc until 2 sts remain.  dc2tog.  ch 2. turn.

5) dc2tog over next 2 st. dc. dc2 tog over next 2 st.  do not fasten off. turn work so that right side is facing you. sc evenly down side of earflap, sc in each st around. fasten off with invisible knot.


add strands to the bottoms of the earflaps for braiding.

FLOWER


start with a magic ring.


Round 1: 10 hdc in magic ring, join to top of first hdc made. pull tail of yarn tightly to close ring.


Round 2: (ch 3, skip next hdc. sl st into next hdc.) Repeat 4 more times. 5 loops made. 


Round 3: working into each loop made by the ch 3: (sc, hdc, dc, hdc, sc) 5 petals made. after completing the last sc, sl st into the back of first petal made where the ch attaches to the original circle made in round 1.


Round 4: Ch 4. sl st to the back between petals 1 & 2. Repeat always connecting to the back behind each petal. 5 new loops made. 


Round 5: working into each loop made by the ch 4: (sc, hdc, 2 dc, hdc, sc) 5 petals made. Sl st behind petal and fasten off leaving a long tail for sewing on flower.


You can continue making a third round by making another row of loops (increasing by one more ch) and then another row of petals (increasing by one more dc).


There it is. Try experimenting with different colors and patterns. I would love to see what you come up with. Feel free to post your projects on the knotty knotty crochet group on facebook! If you are having trouble getting the size that you need refer to the hat size chart.


I made this little hat for my daughter's doll so that they could match!


For a list of crochet stitches and how to make them go here. **You may use this pattern to sell items, but I request that a link or credit be given back to this site** This is a ©2014 Knotty Knotty Crochet pattern, and may not under any circumstances be sold in whole or in part. Duplication is by written permission only.
All photos on this blog are ©Knotty Knotty Crochet and MAY NOT UNDER ANY CIRCUMSTANCES be used to sell your items.


Little flying ace hat, scarf and boot FREE PATTERN!

 I have been wanting to do this little set for a while, and was thrilled when a friend ordered it for her new grand-baby. I can't wait...