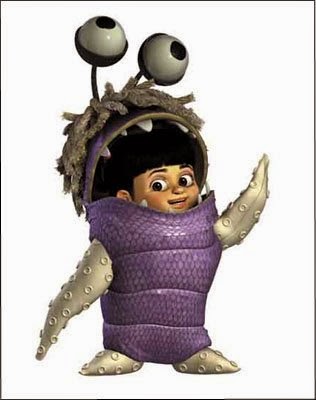
This pattern was made up on the spot by piecing together some other patterns that I had made before.
Materials needed:
J hook, H hook
darning needle
brown, cream, grey and black yarn,
4 buttons for boots
Hat
using brown yarn and H hook, start by forming a magic ring
1. ch 2. 11 dc in ring. join to top of ch 2 (12 sts)
2. ch2. dc in same dc as ch 2. 2dc in each dc (24 st) join every round unless otherwise noted
3. ch 2 dc in same dc as ch 2. (2dc in next dc, dc in next dc) around (36 sts)
4. ch2, dc in same dc as ch 2 (2dc in next st, dc in next two sts) around (48 sts)
5. ch 2. dc in same st, dc all the way around. (48 sts each row) Continue in pattern until 6 more rows
break off yarn using invisible knot.
Earflap: (make 2)
start by attaching brown yarn to hat, ch2 (counts as first stitch) (I fold the hat in half so that the front is showing. I then count in 4 sts from each side on the front and place a stitch marker. This is where I start my earflaps and I work toward the back of the hat where the joining "seam" is.)
1.dc 10, ch 2 turn
2.dc2tog, dc in next 7 st dc2tog ch 2 turn
3.dc2tog, dc in next 5 st, dc2 tog ch 2 turn
4.dc2tog, dc in nex 3 st, dc2tog ch 2 turn
5.dc2tog, dc in nex st, dc2tog ch 2 turn
6.dc2tog twice. break off yarn.
Edging:
with OUTSIDE of hat facing you, attach cream yarn to back of hat and ch 1. sc in each st around, working sc evenly over sides of earflaps. fasten off using invisible knot, weave in all loose ends.
For the rope tassels I cut six equal pieces of both cream and brown yarn. Using three of each for each rope, fold in half and pull the loop end through the bottom of the ear-flap. Separate strands into colors, then twist each strand in the same direction. Twist the strands together in the OPPOSITE direction and you have your rope tassel. Repeat on other side.

1. On the front of the hat, in between where you placed the earflaps and with the front of the hat facing you, attach cream yarn. Ch 2 and dc in each stitch across to where the other ear flap is. ch2, turn.
2. dc in each stitch across. fasten off yarn by using invisible knot and weave in ends.
3. fold flap up and secure with brown yarn in two 'X' shaped stitches in the corners of the flap (as shown)
Goggles:
using grey
Lense:
1. ch 24. sl st in first ch made to form loop. Make sure not to twist the ch. ch 1
2. 2sc in first st. sc in next 7 sts. 2 sc in next st. sc in nex 3 sts. 2sc in next st. sc in next 7 sts. 2 sc in next st. sc in next 3 sts. sl st to top of first sc made.
3. ch 1. ***IN BACK LOOPS ONLY**** sc in each st around. join with sl st. break yarn and weave in loose ends.
4. repeat steps 1-3 to make the second lense of the goggles.
5. with new strand of yarn in grey ch 5. DC in second ch from hook. DC in next two sts. fasten off leaving a long tail for sewing. This is the little piece between the two lenses. sew it on between to two on the last row made on each lense. weave in all loose ends.
Using black:
join yarn anywhere on goggles. sc in each st around both lenses and nose piece of goggles. sl st to first sc. fasten off.
Strap of goggles:
I did not count these stitches, I measured to see how long I needed the strap to be to fit around the hat. ch enough sts to fit around the hat, minus the width of the goggles made. Dc in second ch from hook. DC in each st across. fasten off. sew each end of strap made to sides of goggles. I sewed the strap on in two places at the back, but you don't have to do that. You can have the goggles completely removable if you like.

Scarf pattern:
With J hook:
1. ch 72.
2. in third ch from hook, dc in each st across. (you should have 70 sts here, but it is a scarf and your only goal is to end up with a rectangle. You can make this as long or short as you like, so numbers are not important.) ch 2, turn
3. dc in each st across. ch 2 turn
4. dc in each st across. fasten off using invisible knot.
5. cut several lengths of yarn about 6 inches in length (approx 24 of them). Using two at a time, loop through the bottom edge of the scarf to add the fringe. I fit approximately 6 groups across each end of the scarf. When all fringes have been added, trip with very sharp scissors to a uniform length.
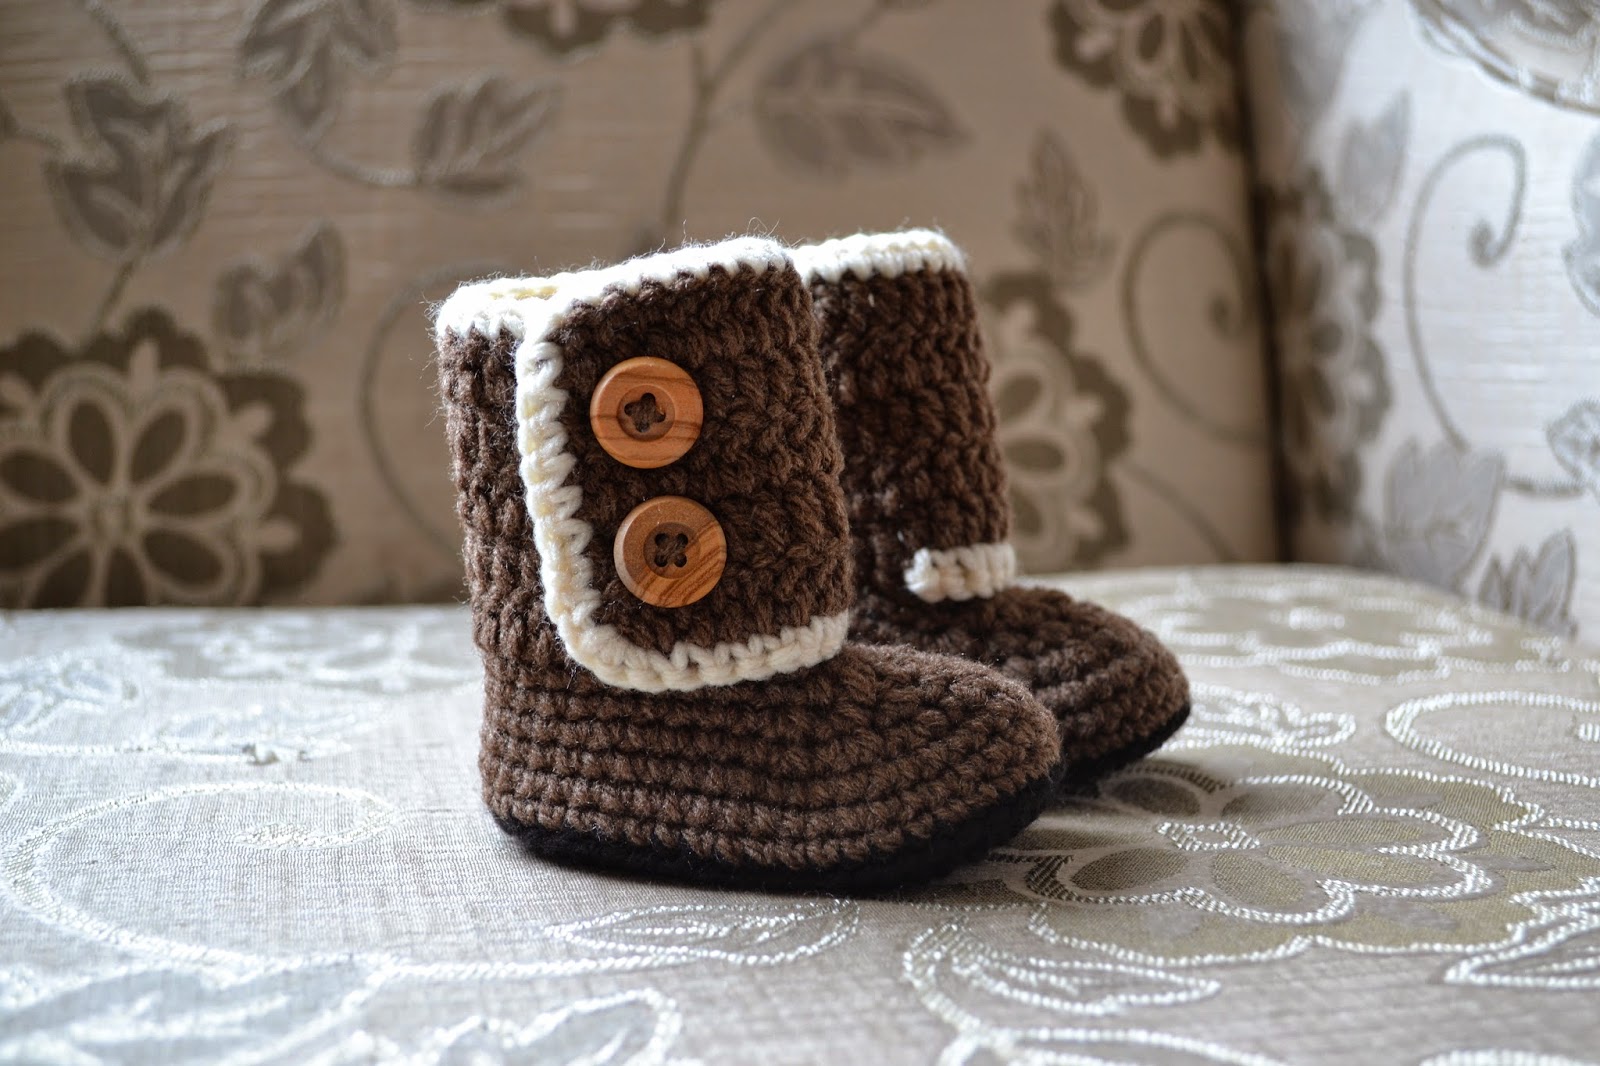
Booties:
I actually purchased this bootie pattern here from Monpetitviolon on Etsy. I cannot copy and paste it though I wish I could. I did add the cream color trim and made them one less round as I thought they were a little too tall for this project. Sorry if you were hoping for a free pattern on this one. Or here is a very similar pattern that I have just recently pinned. Just change colors as necessary, and not as the pattern suggests. Or you could try these similar ones I found for free on Ravelry. Or these.